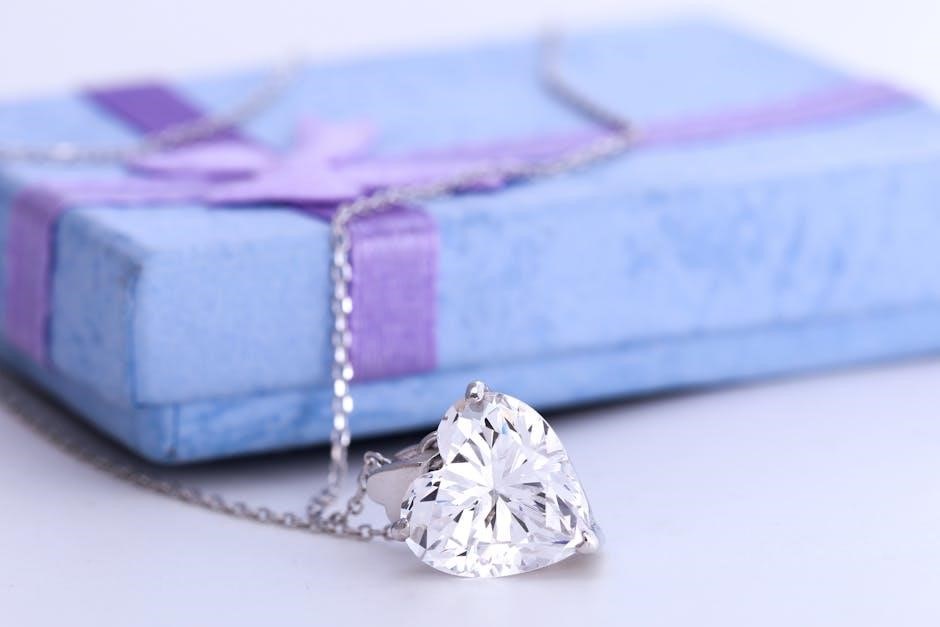
Jewelcrafting in Guild Wars 2 empowers players to create and customize powerful jewelry, enhancing stats and build versatility. It’s a rewarding profession!
What is Jewelcrafting?
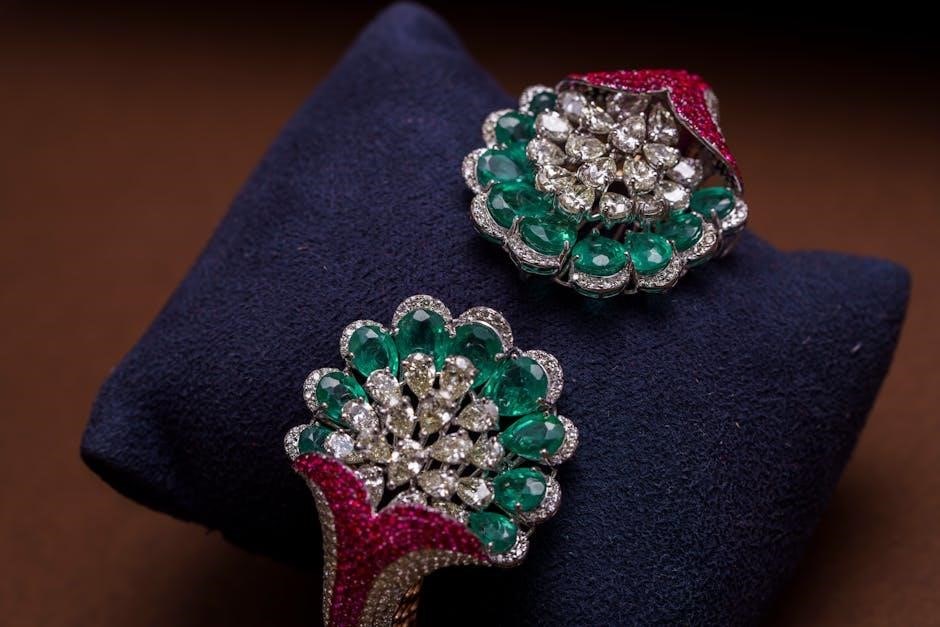
Jewelcrafting is a crafting profession in Guild Wars 2 centered around the creation of necklaces, rings, earrings, and amulets. These items aren’t merely cosmetic; they provide significant stat boosts, influencing a character’s power, precision, and other vital attributes. Jewelers skillfully combine raw materials – ores and gemstones – to forge jewelry with varying levels of quality and rarity.
The profession also allows for gem cutting, refining raw gemstones into polished versions with specific stat bonuses. Furthermore, jewelers can apply infusions to their creations, adding unique effects that further customize gear for specialized builds. Mastering Jewelcrafting unlocks a pathway to self-sufficiency and profit.
Why Choose Jewelcrafting?
Jewelcrafting offers a unique blend of self-sufficiency and economic opportunity within Guild Wars 2. Players gain control over their gear optimization, crafting stat-boosting jewelry tailored to specific builds, reducing reliance on the Trading Post. It’s a consistently demanded profession, ensuring a steady income stream through sales of crafted items.
Moreover, Jewelcrafting provides access to powerful infusions, enhancing gear functionality. The profession’s progression system is engaging, with recipes unlocking through discovery and experimentation. It’s a fulfilling path for players who enjoy crafting and character customization.

Gathering Materials
Essential resources for Jewelcrafting include ores like Titanium and Gold, alongside various gemstones such as Rubies and Sapphires, found throughout Tyria.
Mining Ore
Ore is fundamental to Jewelcrafting, providing the base metal for crafting jewelry pieces. Several types exist, each with unique properties and uses. Titanium is common, while Platinum and Gold are rarer and more valuable. Mining requires a pickaxe and locating ore veins scattered across the world.
Successful mining depends on skill and map knowledge. Higher-level ore nodes often appear in dangerous zones, demanding caution. Efficient miners utilize mining boosts and knowledge of respawn timers to maximize their yield. Remember to upgrade your pickaxe for faster gathering!
Types of Ore (Titanium, Platinum, Gold, etc.)
Titanium Ore is the most abundant, used for basic jewelry and early-game crafting. Platinum Ore offers superior stats and is crucial for mid-tier items, requiring more skilled mining. Gold Ore, the rarest, is essential for high-end jewelry, demanding dedication to acquire.
Silver Ore and Mithril Ore also play roles, offering intermediate options. Each ore type influences the final jewelry’s stats, so choosing wisely is vital. Understanding these differences is key to efficient and profitable Jewelcrafting.
Optimal Mining Locations
The Crystal Desert boasts rich Titanium and Gold deposits, though competition can be fierce. The Iron Highlands provide plentiful Platinum, ideal for consistent farming. Gendarran Fields offer accessible Titanium for beginners, with lower player density.
Harathi Hinterlands and Cray’s Crossing are good for Silver and Mithril. Utilizing mining boosts and knowledge of node respawn timers maximizes efficiency. Remember to check map completion for undiscovered nodes!
Gathering Gems
Gemstones are crucial for enhancing jewelry with powerful stats. Ruby, Sapphire, Emerald, Amethyst, and Diamond are the primary types, each offering unique bonuses. Gathering requires a Gemstone node, identifiable by its sparkling appearance on the map.
Nodes respawn regularly, so efficient routes and quick harvesting are key. Consider using gathering tools and boosts to increase yield. Competition for nodes can be high, especially during peak hours, so plan accordingly!
Gemstone Types (Ruby, Sapphire, Emerald, Amethyst, etc.)
Ruby boosts Power, ideal for damage-dealing builds. Sapphire enhances Precision, crucial for hit chance. Emerald increases Condition Damage, benefiting status effect builds. Amethyst provides Concentration, reducing casting time. Diamond offers Vitality, increasing health.
Each gem type has varying qualities, impacting stat bonuses. Higher quality gems yield greater improvements. Understanding these differences is vital for optimizing jewelry for specific character builds and maximizing effectiveness.
Gemstone Node Locations
Gemstone nodes spawn dynamically throughout Tyria, appearing in various zones. Common locations include the Crystal Desert, especially around the Silverwastes and Mount Kalla. The Brisban Wildlands and Caledon Forest also frequently host nodes. Keep an eye out in open-world areas, as they are visible on the map.
Utilizing map completion and resource trackers can significantly aid in locating these valuable nodes. Competition can be fierce, so quick gathering is essential!

Crafting Basics
Jewelcrafting involves learning disciplines, utilizing a dedicated interface, and accessing crafting stations found in cities and guild halls for production.
Jewelcrafting Disciplines
Jewelcrafting features several key disciplines that unlock progressively as you level the profession. These disciplines focus on specific jewelry types – rings, necklaces, earrings, and amulets. Each discipline requires dedicated research to unlock new recipes and crafting tiers. Mastering these disciplines allows jewelcrafters to create a wider variety of jewelry, catering to diverse player needs and maximizing profit potential.
Furthermore, understanding discipline synergy is crucial for efficient crafting and resource management, ultimately leading to superior jewelry production;
Using the Jewelcrafting Interface
The Jewelcrafting interface is intuitively designed for efficient crafting. The central panel displays available recipes based on your current skill level and discovered knowledge. A materials section clearly lists required components, highlighting deficiencies. The crafting queue allows for batch production, streamlining repetitive tasks. Experimentation is encouraged; the interface provides previews of crafted items and their potential stats. Remember to utilize the research tab to unlock advanced recipes and improve crafting efficiency. Careful interface navigation is key to success!
Crafting Stations
Jewelcrafting requires dedicated crafting stations found throughout Tyria. These stations are typically located within major cities like Rata Sum, Divinity’s Reach, and Lion’s Arch. Public workshops also exist in various zones, offering convenient access while exploring. Utilizing a crafting station is essential for all jewelcrafting activities, from basic jewelry creation to advanced gem cutting and infusion. Stations are generally readily available, though peak times may require patience. Remember to locate a station before beginning any complex crafting endeavor.

Jewelcrafting Recipes
Recipes dictate what jewelry you can craft, ranging from simple rings to complex necklaces, requiring specific materials and skill levels to unlock.
Basic Jewelry Recipes
Starting out, Jewelcrafters focus on fundamental recipes like crafting silver rings, bronze amulets, and simple earrings. These early creations primarily utilize readily available ores – Titanium, Copper, and Iron – alongside basic gemstones such as Carnelian and Lapis Lazuli.
These initial recipes serve as excellent practice for mastering the crafting interface and understanding material requirements. They also provide a modest income stream while leveling the profession. Expect to create numerous pieces to gain proficiency and unlock more complex designs. Focusing on volume early on is key!
Intermediate Jewelry Recipes
As Jewelcrafting skill increases, players unlock recipes demanding Platinum and Gold ores, alongside higher-tier gemstones like Rubies, Sapphires, and Emeralds. Intermediate crafting introduces necklaces, bracelets, and more refined ring designs. These pieces offer improved stat bonuses and often require specific gem cuts for optimal performance.
Recipes at this stage frequently incorporate precursor items, adding complexity and potential profit. Mastering gem cutting becomes crucial, as the quality of inserted gems significantly impacts the final product’s value and effectiveness. Experimentation is encouraged to discover synergistic combinations!
Advanced Jewelry Recipes
Reaching the pinnacle of Jewelcrafting unlocks recipes utilizing Mythic runes and incredibly rare materials like Awakened Diamonds and Infused Orichalcum. These advanced creations boast exceptional stat combinations and unique properties, catering to specialized builds. Expect complex crafting chains and a significant investment in resources.
Master jewelcrafters focus on maximizing infusion slots and gem quality, creating “best-in-slot” jewelry. Precursor crafting becomes essential for obtaining rare components, demanding extensive market knowledge and efficient resource management. Profit margins are substantial, but competition is fierce!
Gem Cutting
Gem cutting refines raw gemstones, influencing their final stats and quality. Precise cuts maximize stat bonuses, crucial for optimizing jewelry effectiveness and market value.
Gem Quality and Stats
Gem quality in Guild Wars 2 significantly impacts the stat bonuses provided by a gem. Gems are rated from Common to Legendary, with higher tiers offering substantial stat increases.
Each gem type – Ruby, Sapphire, Emerald, Amethyst, Topaz – focuses on a specific stat: Power, Precision, Ferocity, Vitality, and Condition Damage, respectively. A gem’s quality directly scales these stats. Legendary gems provide the most significant boosts, making them highly sought after. Understanding these nuances is vital for crafting optimal jewelry for diverse builds and maximizing character potential.
Gem Cutting Materials
Gem cutting requires specific materials beyond the raw gemstone itself. Primarily, you’ll need Crystal Dust, obtained from salvaging unwanted gems or purchased from the Trading Post. Different gem types and desired qualities demand varying amounts of Crystal Dust.
Additionally, Polishing Cloths are consumed during the cutting process, also obtainable through salvaging or the Trading Post. Higher-quality cuts necessitate rarer polishing cloths. Efficient gem cutting involves strategically acquiring these materials to minimize costs and maximize profit, crucial for any aspiring jeweler.
Optimizing Gem Cuts
Optimizing gem cuts is vital for maximizing stat gains and profitability. Understanding gem type affinities – Ruby for Power, Sapphire for Precision, Emerald for Condition – is key. Prioritize cutting for stats aligning with your build or current market demand.
Utilize gem cutting simulations to predict potential stat rolls before committing resources. Regularly check Trading Post prices to identify profitable cuts. Mastering this process transforms raw gems into valuable assets, significantly boosting your Jewelcrafting income and character power.

Infusions
Infusions add potent effects to jewelry, dramatically altering stats and build capabilities. Careful selection is crucial for maximizing character potential and synergy.
Infusion Types and Effects
Infusions in Guild Wars 2 come in diverse types, each offering unique benefits. Offensive infusions boost damage, power, or critical hit chance, ideal for DPS builds. Defensive infusions enhance toughness, vitality, or armor, bolstering survivability. Utility infusions provide boon duration, condition damage, or other specialized effects.
Furthermore, infusions can be broadly categorized by their stat focus – primary stats (Power, Precision, Ferocity) or secondary stats (Condition Damage, Expertise, Concentration). Understanding these distinctions is vital for crafting jewelry tailored to specific combat roles and build requirements. Experimentation is key to discovering optimal combinations!
Applying Infusions to Jewelry
Applying infusions to jewelry in Guild Wars 2 requires a dedicated infusion slot within the crafted piece. This slot unlocks after reaching a certain Jewelcrafting level, enabling customization. The process is straightforward: simply drag the desired infusion onto the jewelry item within your inventory.
However, remember that infusions are bound upon application and cannot be removed. Careful consideration is crucial before committing to a specific infusion. Different jewelry types (earrings, necklaces, rings) accommodate various infusion types, offering build flexibility. Always double-check compatibility!
Best Infusions for Different Builds
Selecting optimal infusions depends heavily on your build. For Power builds, Precision infusions are often favored, maximizing critical hit chance and damage output. Condition builds benefit from Concentration infusions, boosting condition duration and effectiveness. Healing-focused builds thrive with Vitality infusions, enhancing healing power and survivability.
Versatility builds may utilize Universal infusions for a balanced stat boost. Consider specific trait setups; some traits synergize exceptionally well with particular infusion types. Experimentation is key to discovering the perfect infusion combination for your playstyle!

Profit Making
Jewelcrafting offers substantial profit potential through crafting high-demand jewelry, strategically flipping gems, and capitalizing on fluctuating market trends within Guild Wars 2.
Identifying Market Trends
Successfully profiting from Jewelcrafting requires diligent market analysis. Regularly monitor the Trading Post for price fluctuations in ores, gems, and finished jewelry pieces. Pay close attention to demand spikes correlated with new content releases, Living World story updates, or popular build meta shifts. Utilize websites like Guild Wars 2 Efficiency or similar tools to track historical pricing data and identify profitable crafting opportunities.
Understanding which stats are currently favored by the player base – Power, Precision, Ferocity, etc. – is crucial. Observe what materials are consistently selling quickly and at higher prices, indicating strong demand. Anticipating future trends based on announced game changes can also provide a competitive edge.
Crafting for Profit
Maximizing profit through crafting involves strategic recipe selection. Focus on items with a high sell price relative to their material cost. Prioritize crafting jewelry with desirable stats and traits currently in demand. Consider crafting precursor items, which often sell for a premium. Efficient crafting relies on minimizing material waste and utilizing crafting boosts when available.
Batch crafting can significantly increase efficiency. Regularly compare your crafting costs to current market prices to ensure profitability. Don’t be afraid to experiment with different recipes and refine your crafting strategy based on market feedback.
Flipping Gems and Jewelry
Successful flipping requires diligent market watching. Identify undervalued gems and jewelry pieces on the Trading Post, purchasing them with the intent to resell at a higher price. Pay attention to demand fluctuations, especially during peak hours and events. Understanding gem quality and stat combinations is crucial for accurate valuation.
Patience is key; avoid impulsive purchases. Utilize gem cutting to improve gem values before reselling. Consider relisting items strategically to maximize visibility and attract buyers.
Advanced Techniques
Master jewelcrafters delve into precursor crafting, maximizing efficiency with boosts, and understanding complex gem cuts for optimal stat combinations and profit margins.
Precursor Crafting
Precursor crafting represents a pinnacle of Jewelcrafting mastery in Guild Wars 2. It involves utilizing rare precursors – items dropped from various content – to create exceptionally powerful jewelry. These precursors often require specific material combinations and crafting knowledge.
Successfully crafting with precursors yields items with unique stat combinations unavailable through standard recipes. Acquiring these precursors demands participation in Fractals, Raids, and World Boss encounters, adding a challenging layer to the profession. Understanding precursor requirements and market values is crucial for maximizing profits and crafting highly sought-after pieces.
Maximizing Crafting Efficiency
Efficient Jewelcrafting in Guild Wars 2 hinges on strategic planning and resource management. Utilizing crafting boosts from food, equipment, and events significantly reduces material costs and crafting time. Batch crafting, where possible, minimizes repetitive actions and maximizes output.
Optimizing your workstation placement near material vendors streamlines the process. Regularly checking the Trading Post for cheaper materials and precursor components is vital. Mastering recipe knowledge and utilizing crafting salvages effectively reduces waste and boosts overall profitability, leading to faster progression.
Utilizing Crafting Boosts
Crafting boosts are essential for efficient Jewelcrafting in Guild Wars 2. Food provides percentage increases to crafting discipline gains, accelerating skill progression. Specialized crafting gear offers additional boosts to material return rates and crafting speed. Event participation often grants temporary boosts, maximizing output during limited-time opportunities.
Combining these boosts strategically minimizes material consumption and reduces crafting times. Remember to consider boost durations and stack them effectively for optimal results, significantly enhancing your Jewelcrafting endeavors and overall profitability.
Jewelcrafting and World Events
World events often provide unique crafting materials and reward Jewelcrafters with valuable recipes, boosting profits and skill progression significantly.
Benefits of Jewelcrafting during World Events
During World Events, Jewelcrafters gain access to exclusive materials unavailable elsewhere, allowing for the creation of unique and highly sought-after jewelry pieces. These events frequently introduce temporary recipes, offering opportunities to craft powerful items with boosted stats or special effects.
Increased material availability drives down costs, improving profit margins for crafted goods. Participating in events also grants bonus experience points in Jewelcrafting, accelerating skill progression. Furthermore, event-specific gems often appear, providing enhanced customization options for discerning players seeking optimal builds. Don’t miss these lucrative opportunities!
Specific Event Rewards for Jewelcrafters
Certain World Events directly reward Jewelcrafters with unique blueprints for crafting event-themed jewelry, often boasting superior stats or novel properties. These rewards can include schematics for rings, necklaces, earrings, and amulets, tailored to the event’s specific theme and challenges.
Exclusive gem precursors are frequently distributed, enabling the creation of exceptionally rare and powerful gemstones. Event completion often unlocks access to specialized crafting stations, offering temporary bonuses to crafting efficiency or material yields. Keep an eye out for event-specific toolkits that enhance Jewelcrafting skills!

Community Resources
Online forums and Discord servers dedicated to Guild Wars 2 Jewelcrafting offer invaluable guides, market analysis, and build advice from experienced crafters.
Useful Websites and Forums
Several online resources greatly assist Jewelcrafters in Guild Wars 2. The official Guild Wars 2 forums host a dedicated crafting section, brimming with player discussions and guides. Websites like GW2Efficiency provide comprehensive databases for recipes, material costs, and profit margins.
Reddit’s r/Guildwars2 is a vibrant community where players share tips, ask questions, and discuss market trends. Dedicated Jewelcrafting guides can often be found linked within these forums. Don’t overlook specialized GW2 database sites offering detailed item information and crafting calculators, streamlining your process.
Discord Servers for Jewelcrafters
Dedicated Discord servers offer real-time assistance and community for Guild Wars 2 Jewelcrafters. These platforms facilitate quick information exchange regarding market fluctuations, recipe discoveries, and gem cutting strategies. Many servers host channels specifically for buying and selling materials or finished jewelry, fostering a dynamic trading environment.
Finding active servers is key; search online directories or ask within the GW2 subreddit. Experienced crafters often share insights and offer guidance to newcomers, accelerating learning. These communities are invaluable for staying current with meta builds and maximizing profits.
Troubleshooting Common Issues
Jewelcrafting challenges include recipe discovery blocks and material scarcity. Crafting failures can occur, but understanding the system minimizes risks and maximizes success rates.
Recipe Discovery Problems
Discovering new jewelcrafting recipes in Guild Wars 2 relies on experimentation and daily crafting. Sometimes, players encounter frustrating blocks, hindering progress. Utilizing recipe scrolls from the Trading Post can bypass these issues, offering immediate access to desired schematics.
Consistent daily crafting, even of basic items, increases discovery chances. Joining a guild provides access to shared recipe knowledge, accelerating the learning process. Remember that certain recipes require specific crafting disciplines to unlock, so focus your efforts accordingly. Don’t hesitate to consult online guides and communities for assistance!
Material Acquisition Difficulties
Sourcing materials for jewelcrafting, like ores and gemstones, can be challenging in Guild Wars 2. Prices fluctuate significantly on the Trading Post, impacting profitability. Efficient farming requires knowledge of optimal node locations and resource respawn timers. Consider utilizing gathering tools and increasing your perception stat for improved yields.
Alternatively, purchasing materials in bulk during off-peak hours can reduce costs. Joining a guild often provides access to shared resources and coordinated farming efforts. Don’t overlook world events that reward crafting materials as valuable supplements to your supply!
Crafting Failure Prevention
Minimizing crafting failures is crucial for efficient jewelcrafting in Guild Wars 2. Utilizing crafting boosters significantly increases success rates, especially for complex recipes. Ensure you meet the required crafting discipline level for each item; attempting recipes beyond your skill level risks failure.
Maintaining a steady supply of required materials prevents interruptions and potential errors. Regularly inspect your crafting tools for durability, as worn tools can contribute to failures. Finally, consider using the “Continue Crafting” option to queue multiple crafts, reducing manual input and potential mistakes.